Monday, May 9, 2011

Information Gathering with Maltego CE

We’ve been delving rather deeply into reconnaissance tools lately and I wanted to cover at least one last one before moving on to the next phase of a pen test, “Scanning”.

Maltego CE (CE for Community Edition, this means “free”) is an absolutely fantastic tool for performing reconnaissance work on any object you can think of: person, organization, etc.


 INSTALLING MALTEGO COMMUNITY EDITION


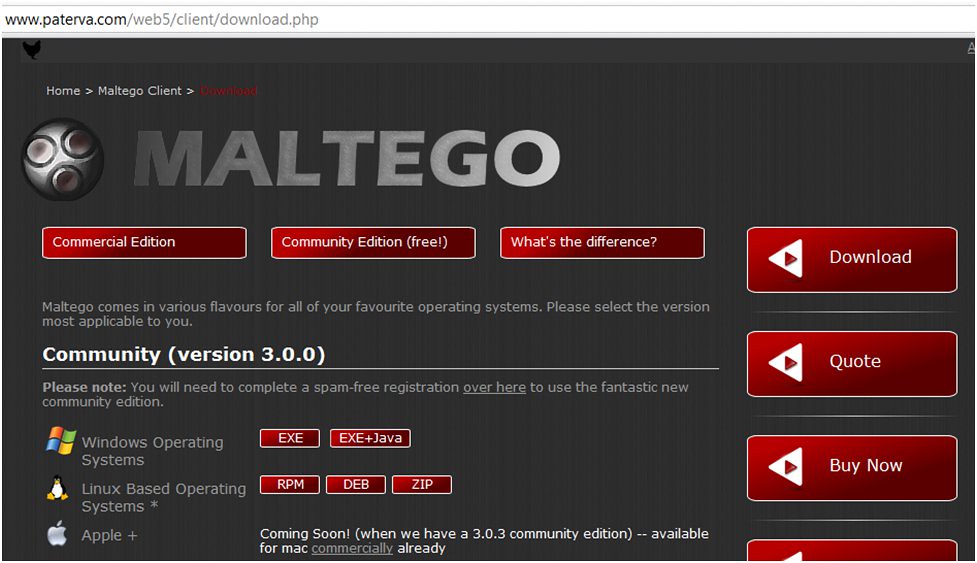
First, you need to download and install Maltego from the www.paterva.com web site. Now, if you’re running Windows, then you’ll have two choices: pick the “EXE+java” option if you don’t already have a Java Runtime Environment (JRE) installed on your machine. If you do, pick the “EXE” (only) option. You can determine if you already have a JRE installed by opening a command prompt and you get a response back when you type “java” and hit “Enter”.


If you’re running Ubuntu or Backtrack, you’ll want to install the “deb” version onto your machine (Ubuntu/Debian and Backtrack all install .deb files). Same checks above apply for Linux to determine if you have Java already installed.


Next, fire up Maltego and login to the Community Server.
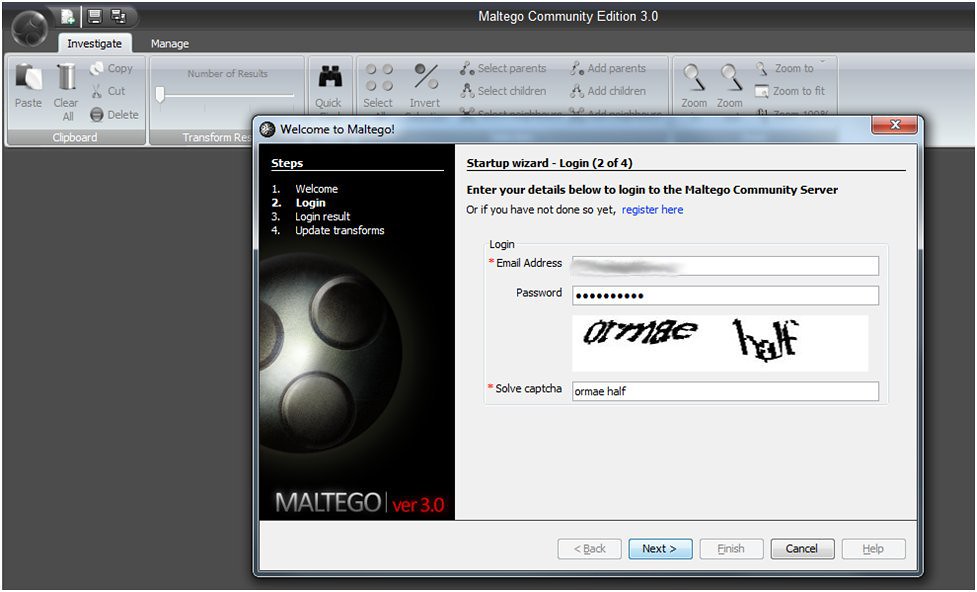


Step 1. You’ll be prompted to login to the Community Server. Create an account or login with one you’ve already created.

Step 2. Then, you will be presented with a blank canvas for you to start mining data with. Maltego is not the most intuitive interface but once you learn how it works, it becomes rather easy to navigate, so let’s go over the basics here and you’ll soon be mastering it on your own.
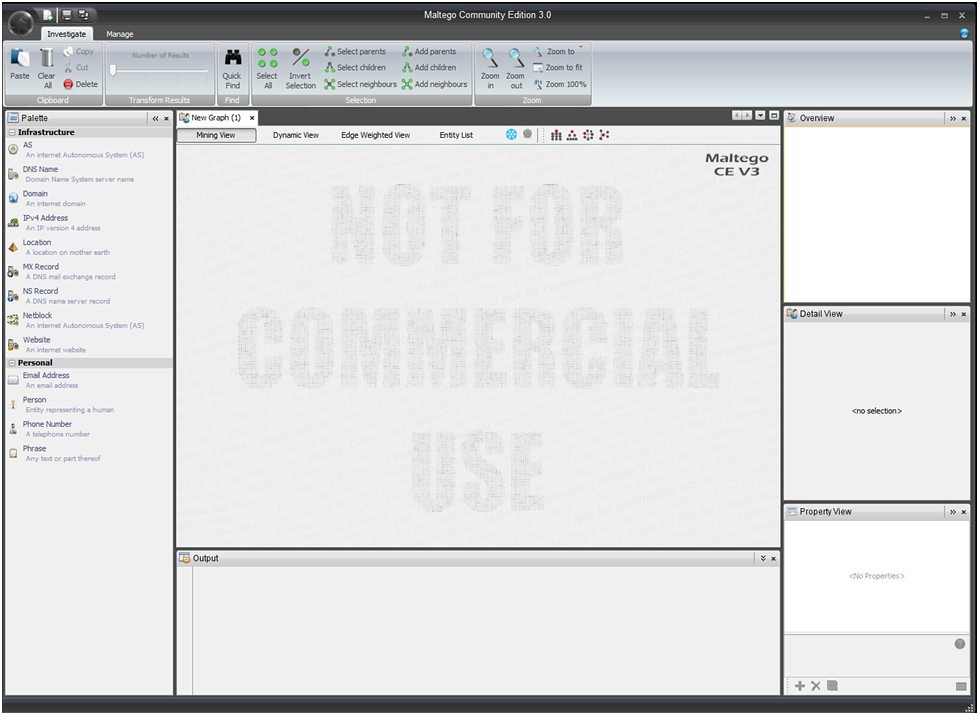

INTRODUCTORY DATA MINING WITH MALTEGO

For our first example, let’s say we wanted to find the phone number of an employee of a certain company. First, we’ve got to become familiar with Maltego’s palette of “entities” we can use to search for information on the Internet. This palette is located on the left side of the screen and is divided up into 2 sections: “Infrastructure” up top and “Personal” down bottom. These are all the different types of entities we can have Maltego go mining data for.

So, if we wanted to find EMPLOYEE INFORMATION for a particular domain, we’d start with the “domain” entity under the “Infrastructure” section of the Palette to start searching data. Why? Because we’re going to use this entity to specify the web domain (usually of the target company) we’d like to find Employee Information about.

MINING DATA FOR EMPLOYEE INFORMATION

Step 1. Click on the “Domain” entity and drag it to the canvas in the middle of the screen. You will be presented with a Domain entity on the canvas, prepopulated with “paterva.com” in it. However, this is a default entity and you will need to fill in some information for Maltego to start mining data. Click on the entity to highlight it.

You will see it change from this:


To this:


Now, you need to modify the “Domain Name” property of this object to make sure you are searching for employees/MX Records/etc for YOUR TARGET web site. So, on the very right-hand side of the screen, towards the bottom, you will see the “Property View” box. In it, you will find the “Domain Name” property of the “Domain” entity you created. Click in the value side (where you see “paterva.com”) and change it to your target.


For our example, we’ll stick to a public-facing, public service web site, like “state.nj.us”.
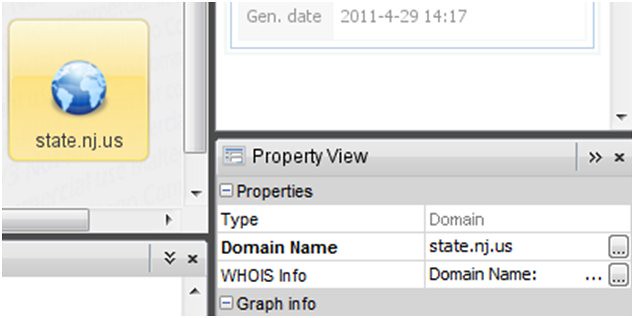

Step 2. Now, right-click on the domain entity and follow the menu system thusly:

Run Transforms à All Transforms à To Email Addresses [Using Search Engine]

This will now start searching the Internet for any and all email addresses that are associated with that domain. From here, once enumerated, you can run transforms on the email entities to dig even further and find more information.
For example,

Step 3. Right-click on an email address that Maltego found and follow the menu system thusly:

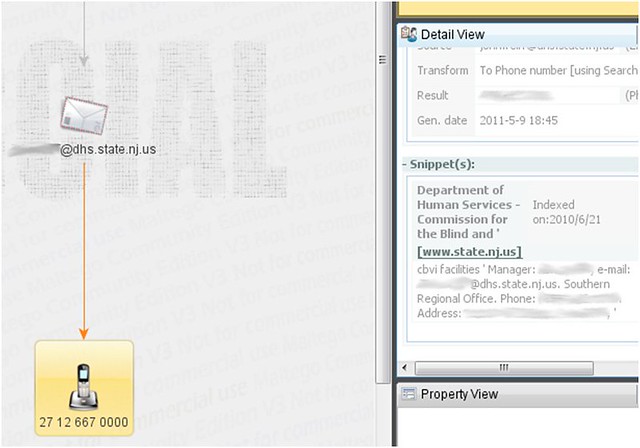
Run Transforms à All Transforms à To Phone Number [Using Search Engine]

Important Note:
Once I ran this transform on my sample data, Maltego’s mining of search engine data turned up a wrong number associated with my email. HOWEVER, by reviewing the “Detail View” snippet on the right-side of the screen, I was able to call up the specific web page, review it and find the exact number I did, in fact, want to use. So, you can’t always trust initial data from tools such as these. However, if used judiciously, you can get the targeted information you want.

ENUMERATING MAIL SERVERS WITH MALTEGO

Now, let’s look up some information that would be important to us when running a pen test or security assessment: We’ll look up their mail servers (MX records in DNS) and their name servers (DNS).

Right-click on the “Domain” entity on the canvas and navigate the menus like so:

Run Transform à DNS from Domain à To DNS Name – MX (mail server)


Maltego will begin to search their DNS records for the mail servers that are designated for this domain. After it has completed its survey, you should be presented with something that looks like this:


Once you’ve collected that information, you can run transforms on those entities as well. For instance, you can click, drag and highlight all those mail servers and then right-click and navigate the menu system like so:
Run Transform à Resolve to IP à To IP Address [DNS]
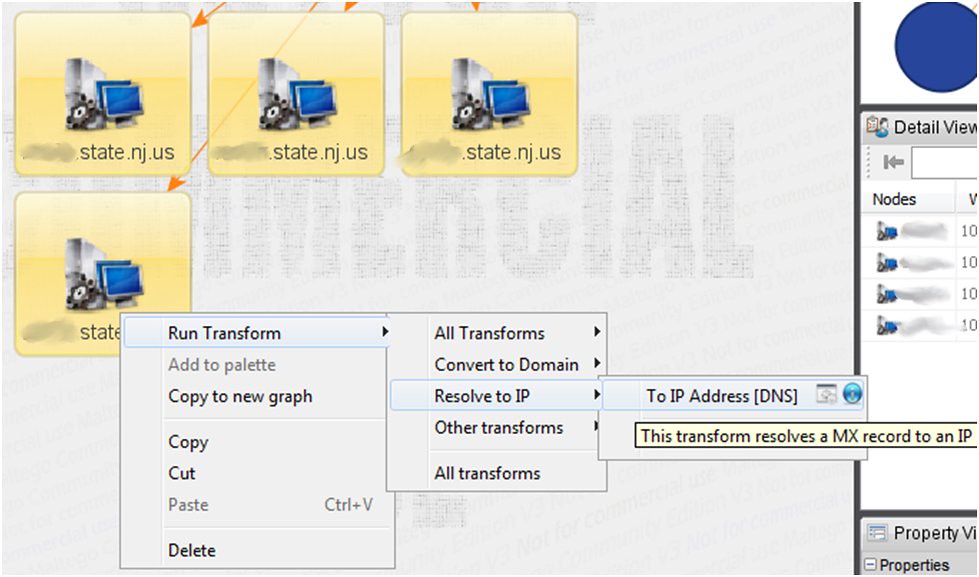


You will then be presented with information like the following:
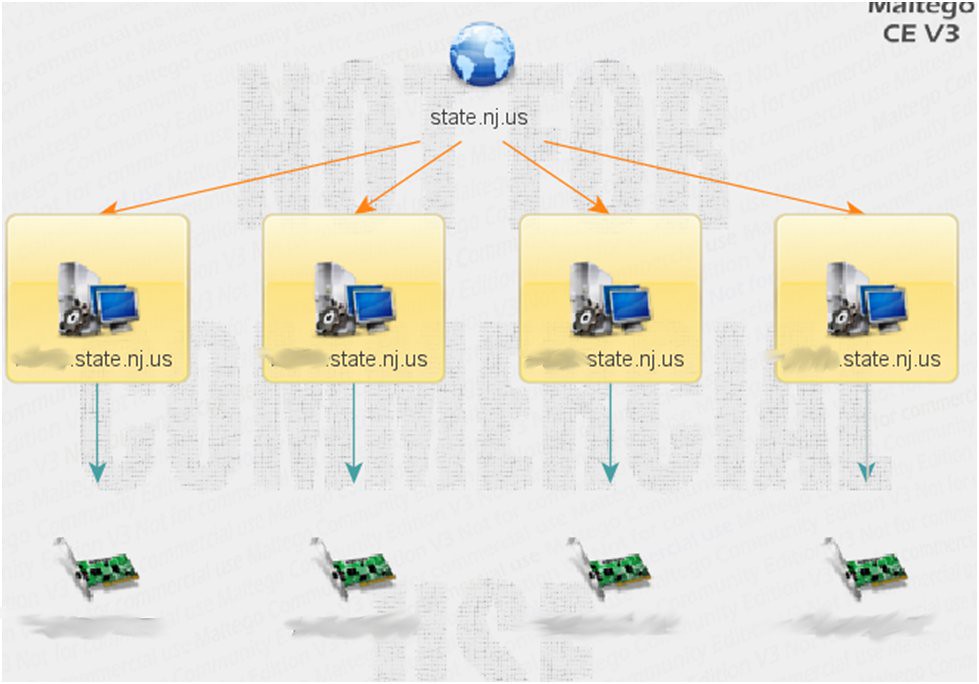

Congratulations! You now have assets that you can use in your next phase of testing: “Scanning”.

ENUMERATING NETBLOCKS AND IP ADDRESSES WITH MALTEGO

Let’s take a look at the target’s name servers and see what kind of information we can glean from them (through reconnaissance)  that we can use in “Scanning”.

Some more information that would be important to us would be the IP blocks (or blocks of network addresses ) that the target manages. Getting those IP’s would be useful, if we are not provided them prior to our engagement. 

Right-click on the “Domain” entity on the canvas and navigate the menus like so:

Run Transform à DNS from Domain à To DNS Name – NS (name server)

After Maltego runs and collects the information for you, it presents it to the users thusly:
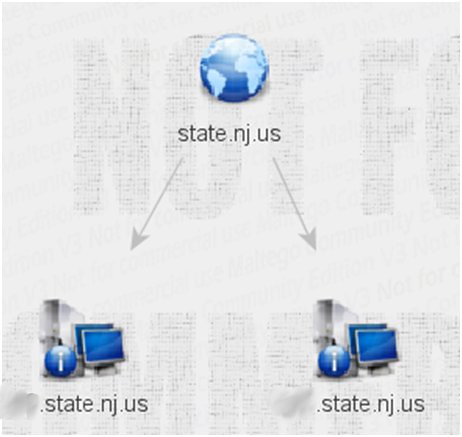

Once you have the nameservers on the canvas, you can then run transforms on them to collect information (data mine). For instance, one really useful transform you can run on the name servers is collecting the netblocks that have been delegated to those name servers.

To collect information like this, highlight the nameservers, right-click and navigate the menus to:

Run Transform
à Info from NS à To Netblock 


This will display the blocks of IP addresses delegated to those nameservers. If these blocks are too big, you can run another transform on them to cut down on the amount of information displayed. The menu navigation to do this is:

Run Transform à All Transforms à Netblock to Netblock

You will be promted for a size to display. I usually pick something fairly middle-of-the-road, like “125” or “250” and that will bring things down to a manageable form.

Once you have a good-sized chunk of data (Netblocks), you can run the “To IP Address” transform on it to convert those blocks of IP Addresses down to single IP’s. This will make it easier for you to dig for other information on those IPs.

Running that transform on the Netblocks results in something that will look like this:
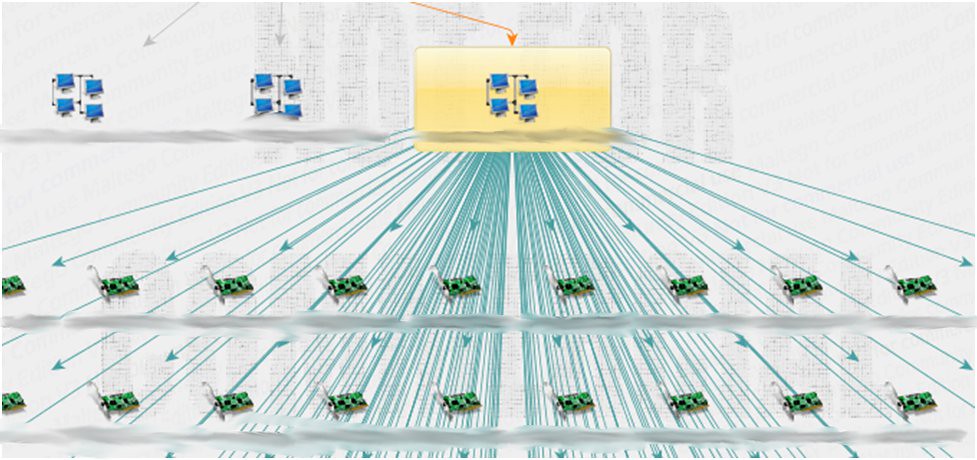

Congratulations! You’ve now gone and enumerated all the IP’s in that space.
Now you can use that to translate it to machine and owner information.

CONCLUSION
Maltego is much more powerful than this, however, and can take a few weeks to really master its intricacies. I highly recommend that you practice using this tool to perfect (and streamline) your reconnaissance skills.

Wednesday, May 4, 2011

Hacking Chat on Twitter - Friday, May 6th @ 1PM EDT

Hey All,

  Join us on Twitter this Friday, May 6th, at 1pm EDT for #hackchat, a weekly meeting of network security minds! Grab a beer and join us. Blow off some steam. Tell us about your favorite vulnerability or the dumbest exploit you've seen.

Tuesday, April 19, 2011

More Recon Tools and A New Vulnerable Web App!

In our last post, we discussed the enormous potential of reconnaissance tools and their importance in the Recon phase of any penetration test. In my readings so far this week, I've come across two new (as in, new to me) tools that we should add to our toolkit.
The first tool is one that's fairly new and may be incredibly useful for internal teams, more than us, as an external pen tester. This tool, Pastenum, enumerates and searches pastebin and pastie.org for any sensitive information an organization might have out on those services. For a closer look at it and an in-depth run through, check out the link below.


Pastenum – Pastebin/pastie enumeration tool

The second tool we should add to our toolkit is rather similar to the WLAuthor script we talked about in our last post. It's a word list generator called L517. From taking a look at it, it's Windows-based, which may help some of our new testers stay in their comfort zone and it's quick.

Check out L517 - WORDLIST GENERATOR below (thanks to Rob Fuller, aka Mubix for the link):

And lastly, if you've gotten your feet wet on a couple of security evaluations or you've been reading some heavy-duty web application books and want to take a swing at your own web app hacking, then check out "BodgeIT Store" below. It's always a good idea for a pen tester to maintain a library of vulnerable applications, servers, vms, etc. (Just ask Chris, whom I continually plague with requests like "hey, do you still have that VM of Windows XP SP 0?") Here's a chance to get a fairly easy web application to evaluate on your own:


BodgeIt Store – Vulnerable Web Application For Penetration Testing

Friday, April 8, 2011

#7 - Installing FOCA in Wine On BackTrack or Ubuntu

Previously, we have discussed using FOCA to perform reconnaissance on a target company. FOCA is a windows-based tool. Some people would find this unfortunate. But, since BackTrack (our penetration testing linux distribution of choice) is Ubuntu-based, we smart hackers can install a Windows emulation environment called 'wine' to install Windows-based software. Here's how:
INSTALLING WINE IN UBUNTU / BACKTRACK
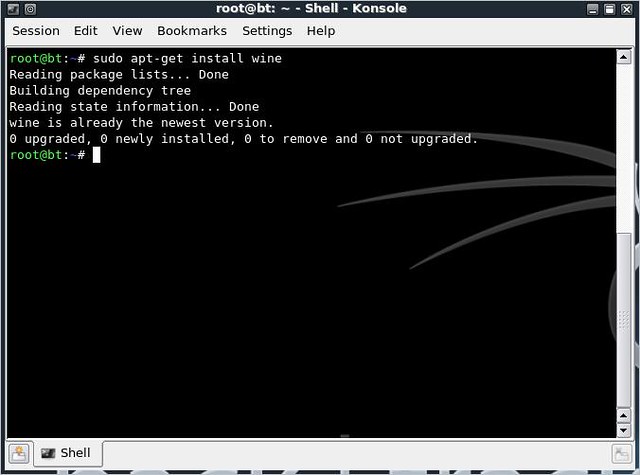
Wine is one of the easiest packages to get installed in Ubuntu. Simply open up a terminal and enter the following text to install wine:
sudo apt-get install wine
And, because we'll need 'rar' installed later on to handle an archive we download, enter the following text in the terminal to download and install 'rar'
sudo apt-get install unrar
That's it. You are ready to install some Windows applications.

Once you've confirmed Wine is installed, it's time to move onto downloading FOCA.

DOWNLOADING FOCA
You're going to need t trade your email address for a copy of FOCA. Now, now. Don't be frightened. The developers of FOCA simply want to ensure they know who's downloading it. Go this address http://www.informatica64.com/DownloadFOCA/
and enter your email address in the proper text box. You will receive an email detailing how to download FOCA.

DOWNLOADING DLLs THAT MAKE FOCA RUN IN WINE
Unfortunately, FOCA does not run “natively” in Wine, for lack of a better term. FOCA needs some extraneous dll's that are not part of the Wine environment, in order to run.
Lucky for you, the smart hacker, they are freely available on the web. Click on the following link and download the rar archive containing the dlls. RAR is the rough equivalent of ZIP files. Ubuntu should be able to handle them if you install the proper software. Download the DLLs in a rar archive:
https://sites.google.com/site/h4ckpl4y3s/DllsFOCA.rar
We'll use this rar archive later, but not until AFTER we install FOCA.
TEACHING OLD WINE NEW TRICKS
There is a script, called "winetricks" that will allow us to install a few extra Windows-based software that will let our Windows programs installed through Wine work better.
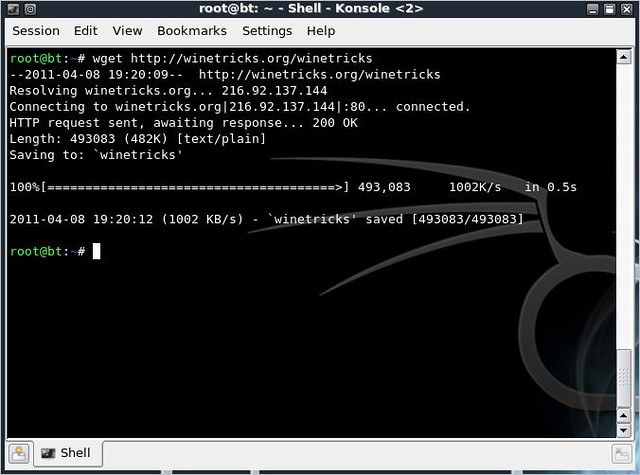
You can install "winetricks" by running the following command from the command line:
wget http://winetricks.org/winetricks

After you've downloaded "winetricks", you need to make the script executable by running the following command on the command line:
chmod 755 ./winetricks
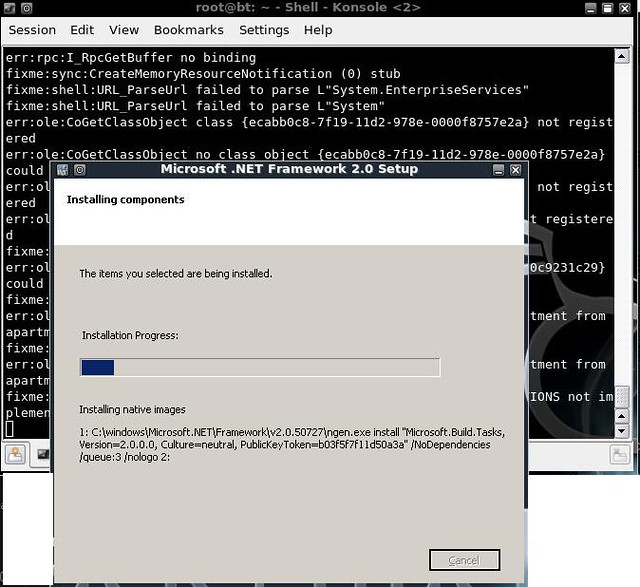
Once you've made winetricks executable, then you'll need to run it and pass it a handful of packages that we need to install in order for FOCA to run in Wine. Those packages are dotnet20, fontfix and gdiplus. So, what we're going to do is run winetricks and pass it the packages we want to install.

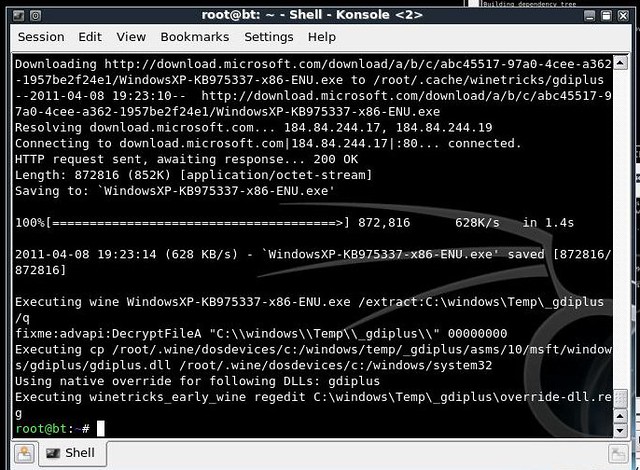
./winetricks dotnet20 fontfix gdiplus


Once it's complete, you'll be returned to the command line.


INSTALLING FOCA IN WINE
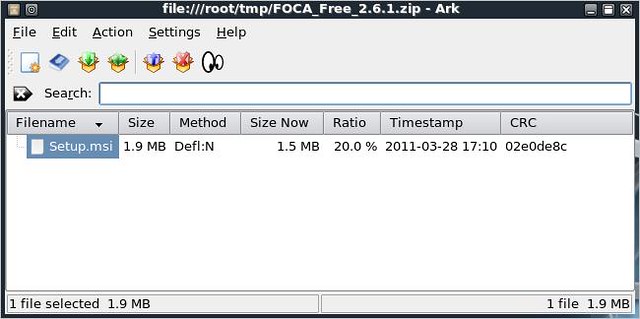
Extract the FOCA_Free_2.6.1.zip file to a temporary folder. And then navigate to that folder in terminal, using the 'cd' command to get there.

Then, use the 'msiexec' command to run the Setup.msi file that was extracted.
msiexec /i ./Setup.msi
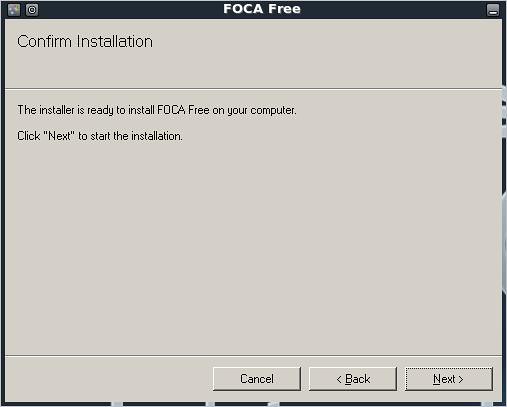
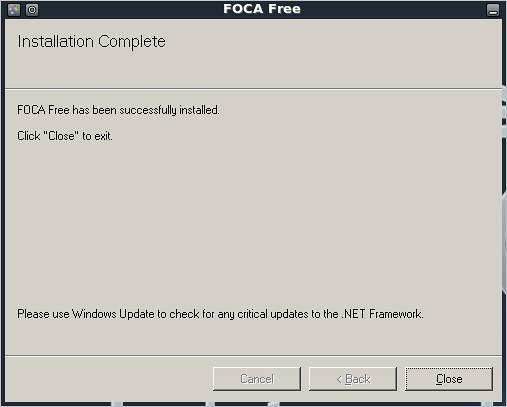
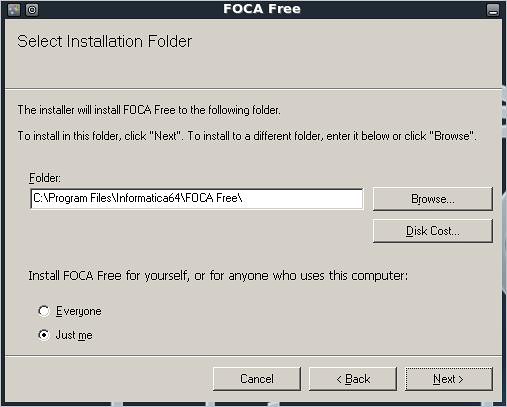
You will be walked through the installation wizard as seen below.

INSTALLING DLLs TO MAKE FOCA RUN IN WINE
Use Ubuntu's Nautilus file explorer, if you're using Ubuntu (or Konqueror, if you're running BackTrack or the Linux command line), and copy the rar archive containing the dll's we need to make FOCA run in Wine and paste it into the directory where FOCA was installed. 
Once you've pasted the DllsFOCA.rar file into the folder, simply right-click and choose the 'Extract Here' menu option. This will create a new folder called XXXX and dump the necessary DLLs into it. Now, just go into that folder, highlight all those DLL files, cut them from that folder and paste them into the “FOCA free” folder. Now, your FOCA install has all the necessary files for FOCA to run.

RUNNING FOCA IN WINE
Browse to: Wine ->  Program Files -> Informatica64 -> FOCA free
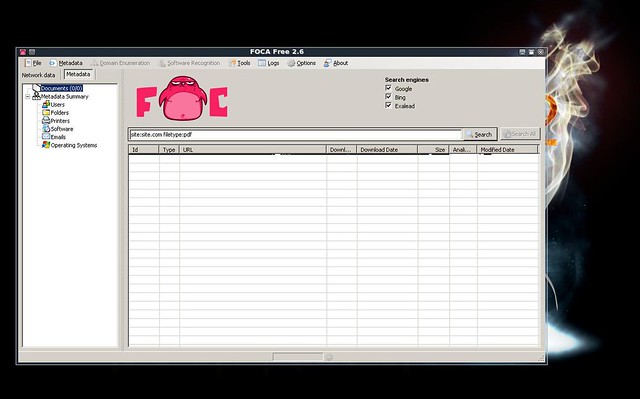
You should then you should be presented with FOCA's main page. Congratulations!
You're now running FOCA on your Ubuntu / BackTrack box!

Thursday, April 7, 2011

#6 - Reconnaissance Tools


The World English Dictionary defines  reconnaissance as “the process of obtaining information about the position,activities, resources, etc, of an enemy or potential enemy”. And what we adopt the word for, when it comes to hacking or penetration  testing is extremely close in concept. We are, in essence, obtaining information about  a potential enemy.

As discussed previously, there are two main types of recon: active and passive. Let's focus on passive reconnaissance and see exactly what kind of information we can dig up.


LOOKING BACK TO SEE THE FUTURE
There are times when, as a penetration tester, you are going to wish you could turn back time and look things up that were on the Internet BEFORE you ever showed up to try to bust into your customers' network. For instance, let's say you know that the customer had an Org Chart posted on its web site six months ago. And let's say this Org Chart holds crucial data you need to pull of a social  engineering attack.

What do you do? Shrug your shoulders and give up?
No way!
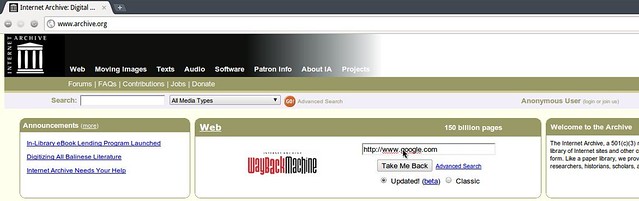
You crack open your favorite web browser and point it to www.archive.org. The Internet Archive keeps snapshots of web sites as they change and archives them for you, the user, to browse at any time.
The tool is called The WayBack Machine (Yes, Mr. Peabody would be proud) and it's found in the middle of the archive.org website as shown here:

In this example, we're attempting to use The WayBack Machine to see what Google looked like years ago.
You simply type in the URL of the web site you would like to browse and The Wayback Machine will present you with a calendar that displays which snapshots are available to you.

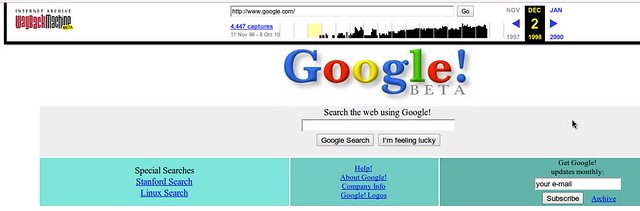
Just pick a copy and you'll be able to view it. For instance, here's what Google.com looked like back in 1998.

And here's what Google.com looked like on July 4, 2002.

So, that Org Chart we were talking about before? With The WayBack Machine, that Org Chart's not out of reach at all. You can get the information you need. You can launch that attack. You can have the win.
NEED A CHECK? YOU GOT CACHE
Google cache is another tool that we, the smart hackers can use to gather information on a particular target. A quick refresher: Google's ability to have such a mind-numbingly granular and spot-on search tool comes from it's spidering ability and the databases that Google keeps of what those spiders come across on the web. These programs crawl the web and index just about everything they come across. Google keeps a current version of these indices and a cached version. You, as a web browser, can use these cached versions to check out older data.
For instance, if you're looking to find a tweet that a potential target sent out yesterday that you know contained some comprimising information about their location, or that they were going to be out on vacation and they subsequently  deleted this morning, you could use the Google Cache function to find it.
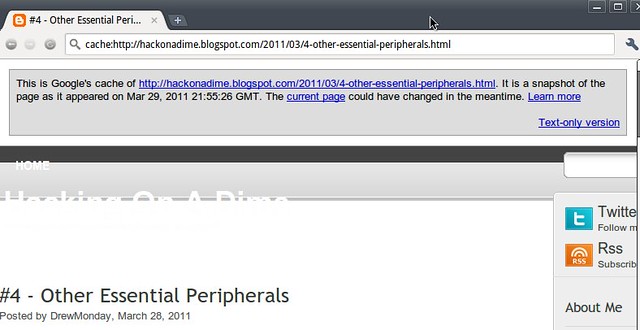
In order to use, simply type in the URL you are looking for into Google's and preface it with the phrase “cache:”. So, let's say we were looking to find the latest cached version of Hack On A Dime's write up on “Other Essential Peripherals”, I'd put the following URL into the Google Search box:
And we'd be presented with the following web page. Note the information banner
across the top of the page, telling us when the snapshot was taken and giving us a link to the current page.

CUSTOM DICTIONARIES
Let's talk about logic for a minute.
Pretend that you're a penetration tester and you've discovered that your  customer's stood up a WEP-encrypted wireless access point. And you want to use some of the techniques we will discuss in later lessons to crack WEP and then join their wireless network as one of their nodes.
Tools like aircrack-ng crack WEP passwords pretty quickly when it comes to words that occur fairly frequently in the wild. However, if our target company is named something outside the norm, let's say “T3aching Guru$”, and their network administrator has stood up a WEP-encrypted wireless access point with a password of “T3achingStudents” or “Guru$Students” or some other variation
of their name. It would take a fairly long time for aircrack-ng to compute these, if at all.
However, we smart hackers can take advantage of public information to speed this process up. How? By creating a custom dictionary that will contain some of this information, some of these specialty phrases in it.
Now, this sounds like a daunting task, trying to figure out all the different phrases that our target company could use. However, odds are that if they are
using any phrases that are outside the norm of our language, they are probably using things like their company name or their company's products.
How can we compile a list of all these phrases and ensure we've got a good percentage of them for our own “nefarious” uses?
Well, I ask you this: where does a company advertise the most about themselves?
That's right: their website. On most companies' web sites, you find the most
information about them, their products, their founders, the cities they exist in, their customers, whatever.
So, the best play for us smart hackers to run is for us to use scripts and tools to
download their web site into a custom dictionary. This will allow us to get “the best bang for our buck” when it comes to catching their “proprietary phrases” as I like to call them.
My favorite tool for this job (and one of the quickest, I find) is a script called
“WLAuthor” (stands for Word List Author). It's a perl script and you can find it on the securityexperiment.com web site here:
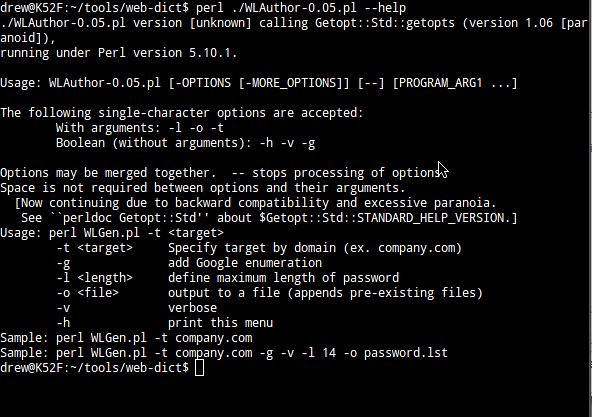
Here is the help screen for Word List Author or WLAuthor

A friend of mine runs a web site with a fairly unique name: www.argofax.com.
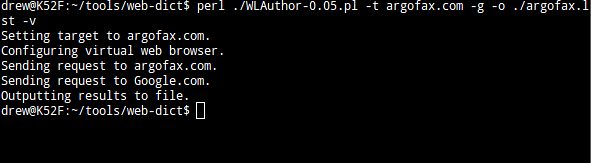
If this were the name of a target company and we wanted to build a custom dictionary that would include all the various interpretation of the word “argofax” (a word NOT found in our common English language), our best bet would be to run a script like WLAuthor against argofax.com.

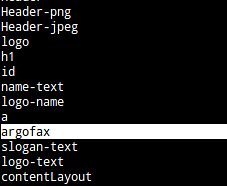
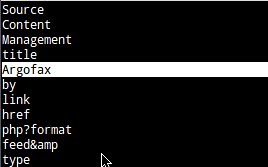
Now, if we were to look at our resulting argofax.lst file, or use “grep” against it
to match certain things, we would see that our dictionary (that we can now use in aircrack-ng or other password cracking tools) contains a lot of specialized words that maybe don't ordinarily appear in the English language.

So, now, we've successfully built ourselves a custom dictionary containing entries
that are “specialized” for our specific target company.
ENUMERATING THE NETWORK FROM THE OUTSIDE
Let's face a simple fact: to the smart hackers, information is key. To quote one of my favorite television shows, “The Prisoner”, “We want information.” Be it usernames, passwords, printer names, emails, phone numbers or server names, we want information.
There are a few other tools out in the wild that will allow us to gather information on a potential target and they do fine jobs. But there is one tool that, in my mind, rises above the rest when it comes to enumerating potential target data from the outside, looking in.
That tool is FOCA. FOCA stands for Fingerprinting Organization with Collected Archives. What does this mean? Well, FOCA takes 3 easy steps that we smart hackers must take and combines them into a single, easy tool. FOCA scans a web site for any and all documents uploaded to it: MS Word (doc, docx), MS Excel  (xls, xlsx), PDF, and a whole slew of others. After it enumerates all the docs on the web site, FOCA downloads them all to your local hard drive. After that, FOCA parses all the METADATA from these docs and provides for you an easy-to-browse interface that will tell you all the emails contained in the docs and their metadata. FOCA will enumerate all the usernames embedded in the metadata. FOCA will enumerate all the shared folders documented in the metadata. FOCA
will enumerate all the printers contained in the metadata.
In essence, FOCA allows you, the smart hacker, to enumerate a LOT of information from the network, BEFORE YOU EVEN TOUCH IT.
FOCA is windows-based but it does run under Wine, so you will be able to run  it on your BackTrack-based laptop. Once you've installed it and got it running, FOCA is a fairly simple to use interface.
Step 1. Create a new project
FOCA saves all its data in easy-to-use projects. Every web site you hit with this tool, create a new project to save the resulting data. You will also need
to designate a folder where FOCA will save all of the documents it's going to download from the web site.
FOCA needs to know which web site you're interested in scanning or else it won't know where to go and download docs from. Enter into the URL into the appropriate text box and then hit the button marked "Create". You will then be presented with FOCA's main screen.

Step 2. Enumerate the Documents
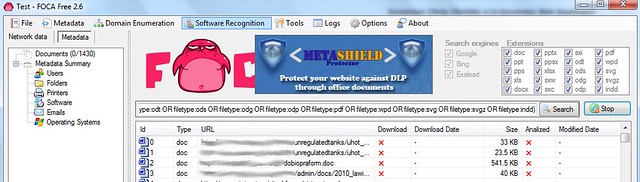
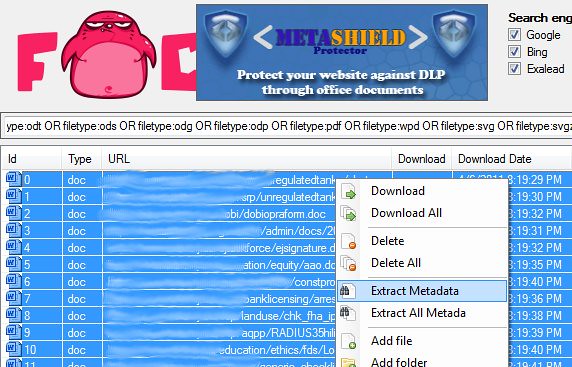
FOCA will crawl the web site you're investigating and will detail for you all the files uploaded and hosted by it.

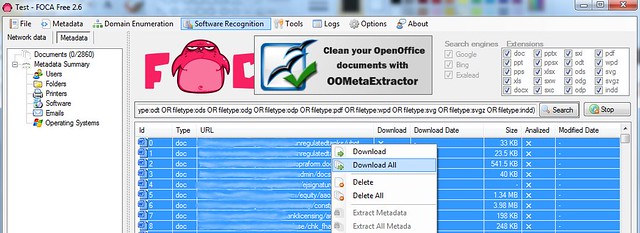
Step 2. Download the Documents
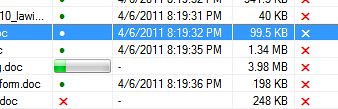
Once FOCA is completed scanning for documents on the web site, download all the documents (sometimes you only want a few, sometimes you'll take
everything you can)

You will know when the files are being downloaded. You'll see a progress bar as it downloads.

Step 3. Extract Metadata
FOCA will then scan the thousands of documents you've downloaded and will enumerate all sorts of useful reconnaissance information that you, the smart  hacker, needs.

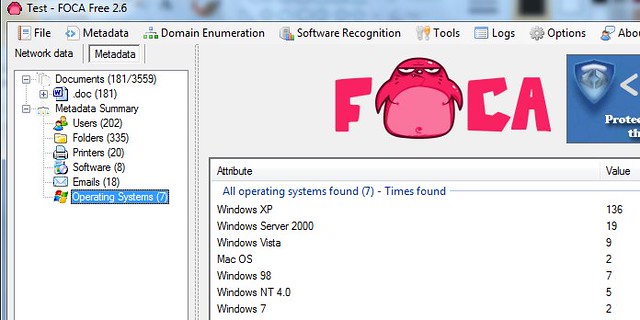
Things like which operating systems are in use on the network:

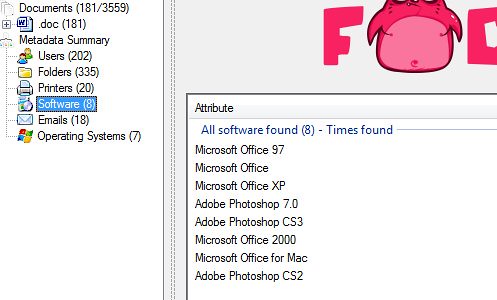
Things like which software is being used on the network:

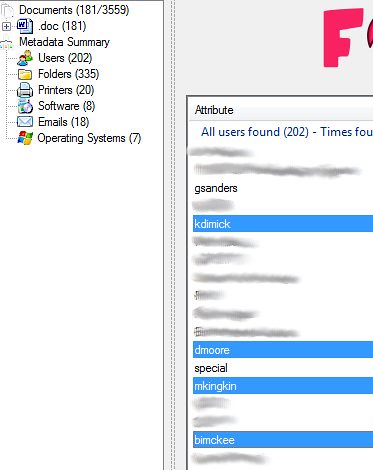
Things like usernames:


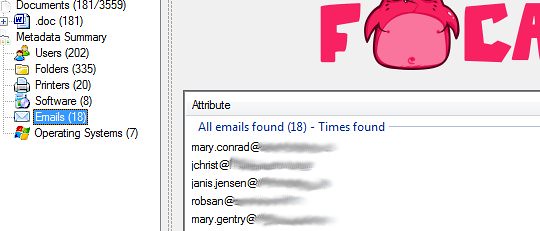
Things like emails:


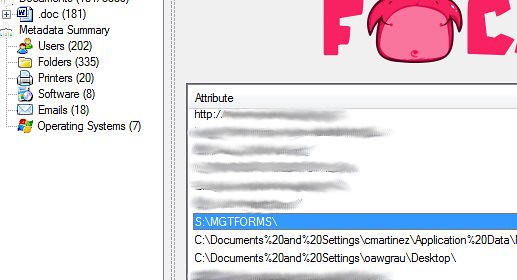
Things like Shared Folders:


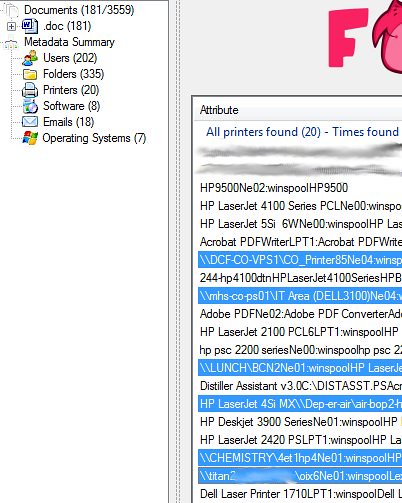
Things like Printers:


But more importantly, we are able to enumerate server names from the printer shares and folder shares.

SUMMARY
Prior to taking on any Pen Testing task, we need to be smart and do our homework. We need to make sure we know information before we even THINK about penetrating the network.
These tools above (and others that are out there) are meant to help us perform our job quicker, easier and more efficient. Next up a quick tutorial on how to install FOCA in a WINE environment on an Ubuntu-based (or BackTrack) box.

Tuesday, March 29, 2011

#5 - Attack Methodology

There are a few schools of thought when it comes to attack methodologies—the plan of attack that a hacker adopts when it comes to penetration testing a network. There are a few variances here and there but most people agree that a good methodology to adopt involves more or less five (5) steps:
  • Reconaissance
  • Scanning and Enumeration
  • Gaining Access (and Escalation of Privileges)
  • Maintaining Access
  • Covering Your Tracks
The preceding steps are the official attack methodology proposed by the EC-Council in its Certified Ethical Hacker (CEH) certification. For the purpose of the rest of the lessons, we'll stick to these steps, unless something else comes along.

Let's look at these steps a little more in-depth:
RECONNAISSANCE
Reconnaissance is the act of gathering information. An attacker will attempt to gather as much information about a target (a company, a web site, or a platform) as they can. This reconnaissance can be either passive or active. For instance, an attacker wanting to gather information passively might perform some extremely thorough and pointed internet searches to find out as much as possible about a company. They might try to find Organization Charts, personnel listings, contact information.
BackTrack has some excellent reconnaissance tools built into it and we'll discuss them more in-depth in the next lesson. Also, we'll discuss a few tools that I think happen to do excellent jobs in the passive act of reconnaissance.
When we discuss active reconnaissance, however, we're typically speaking about an attacker who is scanning ports or services in order to obtain more in-depth knowledge about his victim. Walking along firewall rules and dumpster diving are other examples of this kind of reconnaissance.
SCANNING AND ENUMERATION
Utilizing port scanners, vulnerability scanners and performing war dialing are all examples of what an attacker would use to accomplish this task. We're going to focus a lot of our time on nmap and nessus during these lessons but we'll determine if there are any other scanning tools that help perform these tasks better.
GAINING ACCESS (AND ESCALATION OF PRIVILEGES)
This step in an attack methodology is where the actual hack or attack takes place. The attacker launches some sort of attack against a service, a port, a login, etc. and is able to gain access to the system.
MAINTAINING ACCESS
Once an attacker penetrates a system, they will most likely want to return for future use and they'll want to make sure that the system is easier to gain access next time. This is performed through the use of tools like rootkits and Trojan Horses that leave backdoors into systems.
COVERING YOUR TRACKS
Once you have implemented an attack, taken control of a box and left yourself a backdoor to enter any time you like, you need to cover your tracks and hide all signs you were ever there. This includes emptying of logs and wiping of system data.
SUMMARY
All right. Now that we've determined what steps make up our attack methodology, let's take an in-depth look at Reconnaissance.