While teaching my CISSP students the other day, we got to talking about cryptography. This lead to a discussion about implementing PGP on your personal email and how you could accomplish this.
In the past, I have used Thunderbird and the Enigmail plugin to help implement PGP on my personal email and, through this discussion with my students, I realized I’d dropped the capability almost as quick as I’d picked it up.
Why? Mostly because the only person I was trading encrypted emails with was my friend Mike in Chicago and I think we might have done that a grand total of once. So, it wasn’t a pressing technology at all. And when I wiped out my Ubuntu for Windows 7 (*gasp*!) I forgot to backup my encryption keys and promptly decided not to bother with it again.
But nowadays, I’m interfacing with many more people and the need for cryptography on my personal e-mail is growing. So, I thought I’d give a quick write up on using Enigmail with Thunderbird.
However, one thing I’ve always wanted to do was implement the same ability on my Android phone. I’ve got a Droid X (first generation) and, since I’ve still got another year on my contract with it, I like to keep myself from getting bored with such an antiquated phone.
So, this past week, I decided to re-implement Enigmail on Thunderbird. And when I was done with that, I wanted to find out how to USE THE SAME KEYS on my mobile device to encrypt email.
Since this is a “plug-it-all-together” kind of implementation, I thought I’d share with all of you. I’ll give you fair warning, though, there are quite a few (but easy) steps to this, so the write up could be long.
Thunderbird & Enigmail
I’m not going to write a tutorial on how to install Thunderbird. Grab it off Mozilla’s site and install it, if you don’t use it already. It’s a great e-mail client and it’s free. There’s nothing better than not paying a license to read your mail.
Once it’s installed and configured for your e-mail account (mine’s a gmail account), then you’re going to want to download and install Enigmail. Enigmail is an extension for Thunderbird that allows you to write and receive encrypted email. It does this by communicating with GnuPG, an open-source implementation of the OpenPGP standard.
So, the first thing we’re going to need to install is GnuPG for Windows (or GPG4Win, as it’s known). If you’re a linux user, you can download and install GnuPG as a package in your distribution. A little googling and you’ll find it. For those that are Windows users, follow the instructions below.
GPG4Win
So, for Windows users, download GPG4Win from www.gpg4win.org.
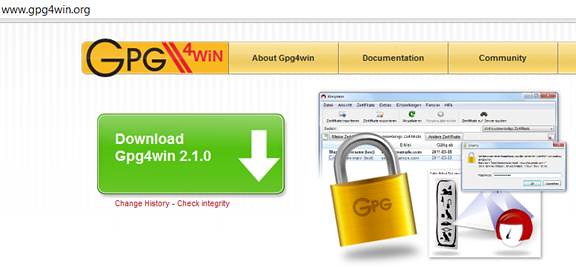
Since we’re savvy security folks, we’re going to check the file’s hash, since the developers were so kind to include it on our web site.
For this task, I use hashtab, a Windows Explorer extension found at http://implbits.com/HashTab/HashTabWindows.aspx

It’s a match, let’s install it. Installation is very straight-forward, so just remember the path that you installed it into in case Enigmail can’t find the executables later. Enigmail sometimes has problems finding GnuPG.
Installing Enigmail
Prior to installing Enigmail, your Thunderbird menu bars will look something like this:

When we’ve installed Enigmail, we’ll have another menu item, called “OpenPGP”. We’ll show that in a few.
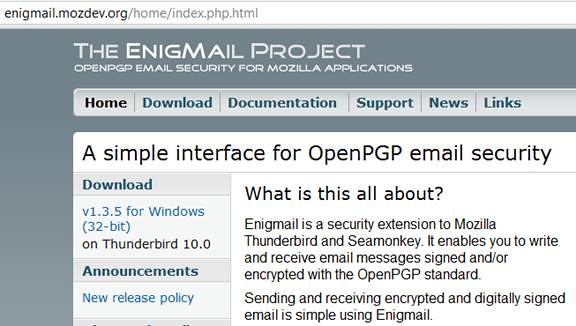
The first thing we want to do is download Enigmail from their web site: http://enigmail.mozdev.org/home/index.php.html
Once you’ve downloaded it, open up Thunderbird and click on the “Tools” menu and select “Add-Ons”.
You will be presented with the screen below. Click on the gear-shaped icon as shown in the detail below and select “Install Add-on From File …”
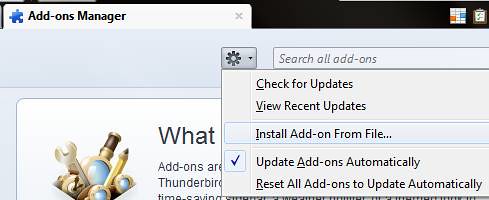
Browse to where you downloaded Enigmail (it’s a file with a .xpi extension and it’s usually named something like “enigmail-X.X.X-sm+tb-windows.xpi”) and Enigmail will install.
Once you’ve installed, it however, you will need to set up Enigmail. It’s also possible Thunderbird will need to restart after Enigmail’s install, so feel free to do that now.
Enigmail Setup
Once you’ve gotten Thunderbird restarted, it’s time to set up Enigmail. Setup is very easy, since there’s a wizard that walks you through it. However, we’ll go through the necessary steps below. It is also possible that Enigmail will not be able to find the GPG executables (because it’s looking for “gpg.exe” and GPG4Win provides you with a “gpg2.exe”), if this is the case and you are prompted to browse for your GnuPG files, simply browse to the directory where you installed GPG4Win and locate the “gpg2.exe” file.
If that’s all out of the way, let’s setup Enigmail.
Enigmail Setup Wizard
To launch the Setup Wizard for Enigmail, you should
Click the “OpenPGP” menu and select the “Setup Wizard”

On the first screen of the Setup Wizard, select “Yes, I would like the wizard to get me started”

On the second screen, choose which email account you’d like to create a key pair for. As I have several email accounts, Enigmail chose to ask me if I wanted to create key pairs for each of my accounts. Since I only want to do this for my fleec3@gmail.com account, I only checked off that one. You may not be presented with this choice if you have only one e-mail account.

On the next screen, you will be asked if you want to sign all of your outgoing e-mail by default. This is one of the best ways to get your public key out in the public (and that’s the intent of this exercise, isn’t it?) so, I chose “Yes, I want to sign all of my email”

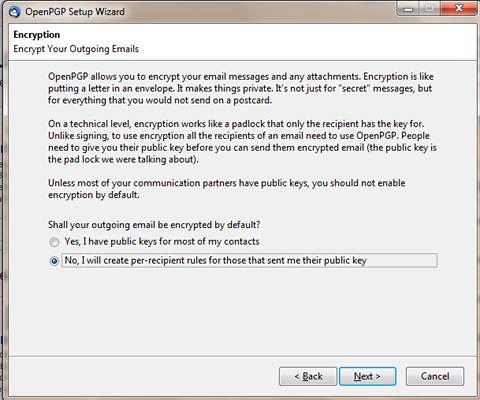
On the next screen, you will be asked if your outgoing emails shall be encrypted by default. Since I don’t have in my possession a lot of my contacts’ public keys yet, I chose to answer “No, I will create per-recipient rules for those that sent me their public keys”
On the last screen of the Enigmail Setup Wizard, you will be asked if it is ok that Enigmail make some changes to Thunderbird for you. Those changes are:
“Disable loading IMAP parts on demand”
“Disable flowed text”
“View Message body as plain text”
“Use 8-bit encoding for message sending”
And lastly,
“Do not compose HTML Messages”
Personally, I don’t mind any of these changes, for the most part. However, I decided to uncheck “View message body as plain text” because most of the email I get is nicely created with HTML. So far, I haven’t seen too much of an issue with this setting remaining unchecked.

On the next screen, you will be prompted if you want to generate a new key pair or if you want to use an existing pair. If you’ve previously used another set of keys, this is where you could import them into Enigmail.

On the next screen, Enigmail will ask you for a passphrase to use when protecting your private key. It password-protects it and when you want to use your private key for decryption, it will prompt you for this passphrase. This means you’ll want to keep this passphrase handy (perhaps in Keepass?) or keep it something you’ll remember (and please, don’t make it “Password1”).
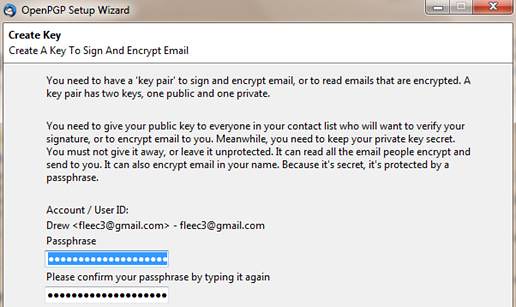
Enigmail will then generate the keys for you.

Here’s what the Setup Wizard will look like while it’s generating the keys …

Once key generation is completed, Enigmail will prompt you to generate a certificate you can use for revoking your key, when necessary. I recommend generating this certificate and leaving it somewhere you will remember.

Once you click “Generate Certificate”, it will prompt you where to save the Revocation Certificate. Please save it somewhere other than the GnuPG directory (the default location). It is something you should protect and leave somewhere secure.

Once you have completed the Setup Wizard, your e-mails from that account should have the “Sign Message” selection under “OpenPGP” checked off. If you have a public key from one of your e-mail contacts, then you should be able to Encrypt a message to that contact as well.

If your main goal was to install Enigmail on your computer/laptop to sign and encrypt mail in Thunderbird, you’re done!
For me, I wanted to go that extra step and use these same keys I generated for Thunderbird and use them to encrypt emails from my Android device. Luckily, there exists a way to do this.
Encrypted Email on Android OS
So, the very same way we used OpenPGP software on our Windows OS, we need to install the same kind of cryptography software on our Android OS. And the same way we used Thunderbird to send encrypted e-mails, we need to install an e-mail client on our Android OS that will allow us to use cryptography, as well.
Luckily, Android Privacy Guard (located here: http://thialfihar.org/projects/apg/ ) gives Android users the ability to implement GnuPG on their Android devices.
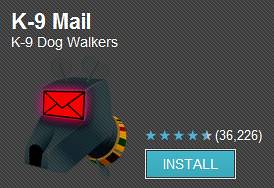
And, as luck would have it, an email client called k9mail (whose page is located here: http://code.google.com/p/k9mail/) has built-in integration for AGP. So, just like we used a plugin for Thunderbird to implement GnuPG, we can install k9mail and have it interface with AGP to provide us GnuPG functionality!
AGP
On your Android device, you can get AGP in the Android Market. Or you can go here: https://market.android.com/details?id=org.thialfihar.android.apg

K9Mail
On your Android device, you can get k9mail in the Android Market. Or you can go here: https://market.android.com/details?id=com.fsck.k9
Once you have both of those pieces of software installed, we can use Enigmail to export our public and private keys into AGP.
Enigmail Key Management
In Thunderbird, click the “OpenPGP” menu and select “Key Management”.
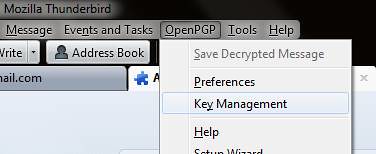
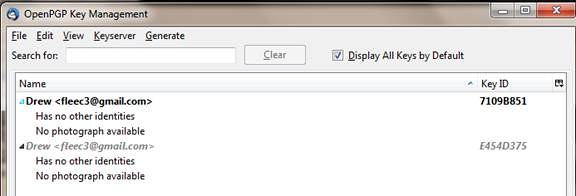
Then, the Key Management console will come up.
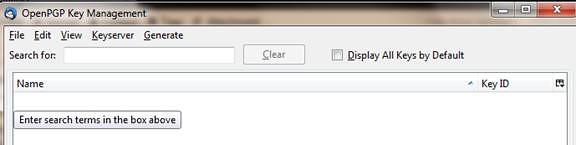
Now, it may look like you have no keys in Key Management, but you do. Check the checkbox next to “Display All Keys by Default” and you will now see the keys that were generated from our Enigmail Setup Wizard.
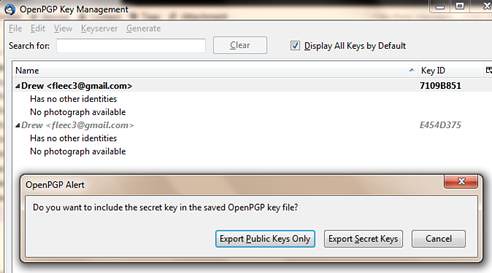
In order to export your keys to files, right click the identity you want to export and select “Export Keys to File”.

Enigmail asks if you want to include the Secret Key in your export file. Answer yes to this by click “Export Secret Keys”.
Your export file with both your Public and your Secret key will want to be exported to an ASCII file (.asc).
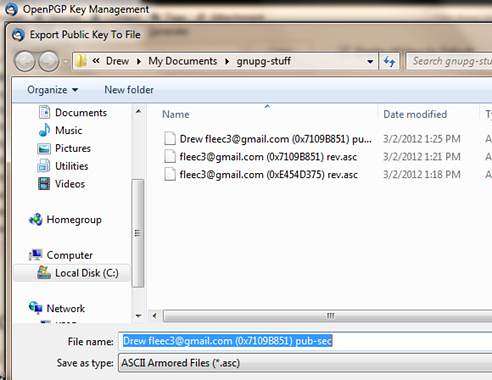
Hold onto this file because we’re going to copy it to our Android device momentarily.
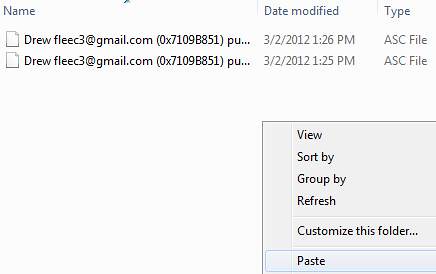
Copy your public and secret key export file to your Android device
At this point, plug your Android device into your laptop, make sure your USB connection is set to “USB Mass Storage” and copy your export file(s) to your Android device. I highly suggest that you copy them to /mnt/sdcard/AGP, as AGP will be looking in there for .asc files by default.

If you’ve successfully copied your .asc files over to your Android device, you can unmount the USB mass storage, eject the USB device and you’re ready to rock.
Importing keys into AGP
From here on in, we’ll be working solely on the Android device.
To import keys into AGP, you’ll need to fire up AGP.

Next, hit the “Menu” button to bring up AGP’s menu.
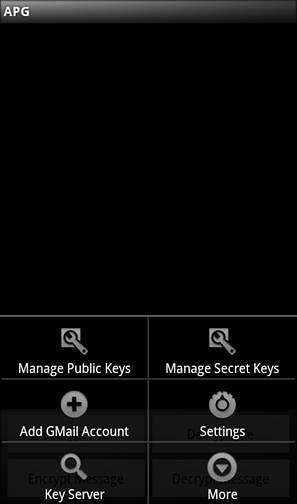
Select the “Manage Public Keys” button.
AGP will give you a dialog to browse for the .asc files we’ve copied over. Hopefully, you’ve copied them to the SD card’s AGP directory (or made one and then copied the files in). Because AGP asks for that location by default. Save yourself some browsing around and just copy the files into the /mnt/sdcard/AGP folder.
If you use Android’s File Explorer to browse to the .asc files, you will most likely get returned to the dialog with this type of content:
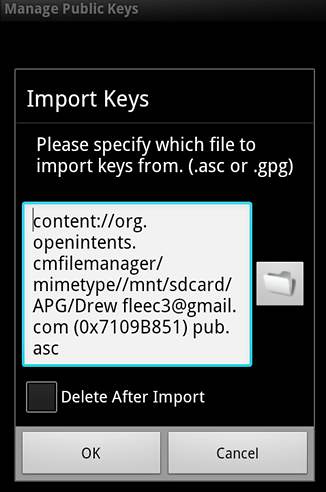
Now, you may be asking “What is all THAT!?”
Don’t worry. The scientific answer is: “It’s all gobbledy-gook”. Seriously. We don’t need it all and I’m not going to use my Google-searching minutes finding out what it really is. So just do this: cut out everyting BEFORE “/mnt/sdcard…..”
So that it instead looks like this:

Go ahead. I’ll wait. Just click in there and make sure you keep the leading backslash (“/”) before mnt and hit the backspace button to remove everything before it.
Now click “OK” and AGP will import your public keys.
When it’s completed, you should see a screen like this:

At this point, you need to repeat this step as we have already done, but instead, this time, you’re going to perform these steps and select the “Manage Secret Keys” button, instead.
Setting Up K9Mail
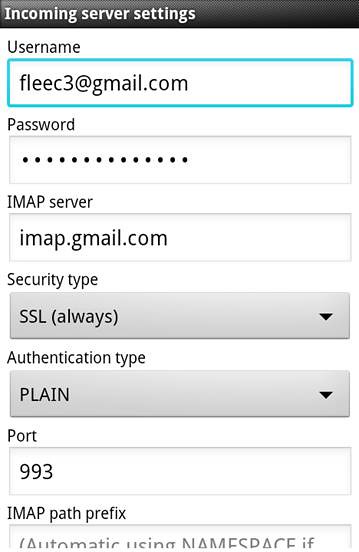
Now, I set up k9mail to use my fleec3 gmail account. You may have another email provider. Know your Incoming and Outgoing server settings (you probably needed to find them in order to set up Thunderbird).
For those of you using google mail, your server settings will most likely be close to those below. K9mail has a wizard that will help you set up the account, but if you don’t get it set up at first, you can edit your account settings.

Incoming server settings (Under “Fetching Mail”):
Outgoing Server settings (Under “Sending Mail”):

Once you have your account set up, you can tell k9mail to use AGP to encrypt emails (Under “Cryptography”):
- Under the “OpenPGP Provider” option, select APG.
- Check the checkbox next to “Auto-sign”

That’s it. At this point, you can send and receive encrypted emails on your Android device or on your laptop/computer using Thunderbird. Either way, you’re using the very same keys.
Conclusion
I hope this walk-through helped you set up encrypted email both on your computer as well as on your mobile Android device. If you have any questions, feel free to ask either in the comments below or hit me up on Twitter.